First of all, you will need a print script and for print from the WebApp location defined.
How to setup location:
https://support.boyum-it.com/hc/en-us/articles/360000254048-Beas-How-to-print-from-web-app
As print script, we recommend using the following one.
In the attachment you can find other examples.
//Direct Print preview work order
printobject=setvar=sofortdruck=J
printobject=setvar=druckcopy=1
printobject=setvar=Auftrags-Nr:=20180035
printobject=setvar=belpos_id_von=10
printobject=setvar=belpos_id_bis=10
printobject=parameter
printobject=parameter_set
printobject=print=workorder.rpt
Here you need to replace yours report parameters (Auftrag-Nr:, belpos_id etc).
To use the proper value (variable) you need to know the variable name.
As a second step, you need a user event with the function of your process.
In Beas 2021.02 this is new, but the concept is the same.
Go to Add-On administration - user events, and look for the correct function.
For example, you would like to do this after a WO good receipt.
In your version there will be an expand button with which you can access a couple of events.
In Beas 2021.02, this how it looks:
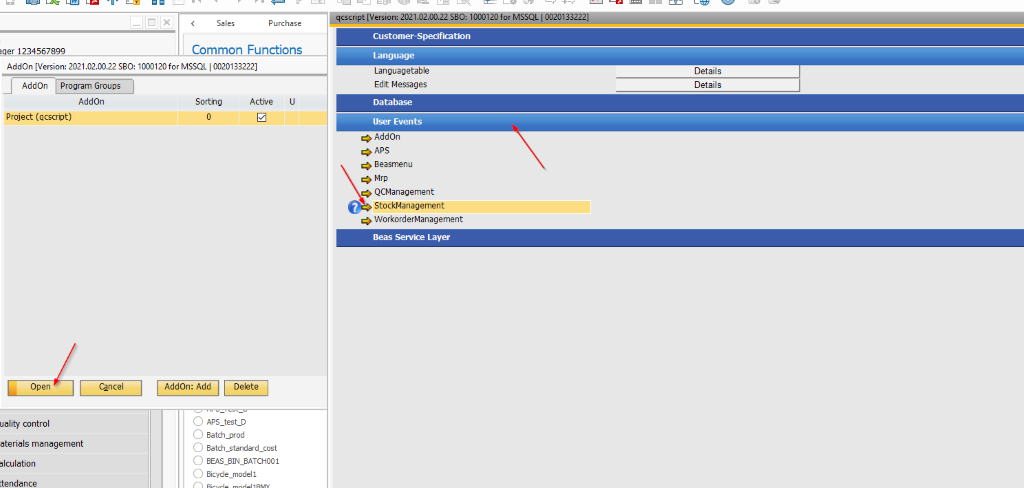
After you click on the arrow, you will see this:
These are the events which you can trigger. You will need to decide which one you would like to use - there is a difference between stockmanagment, workordermanagment etc (each one creates its own file)
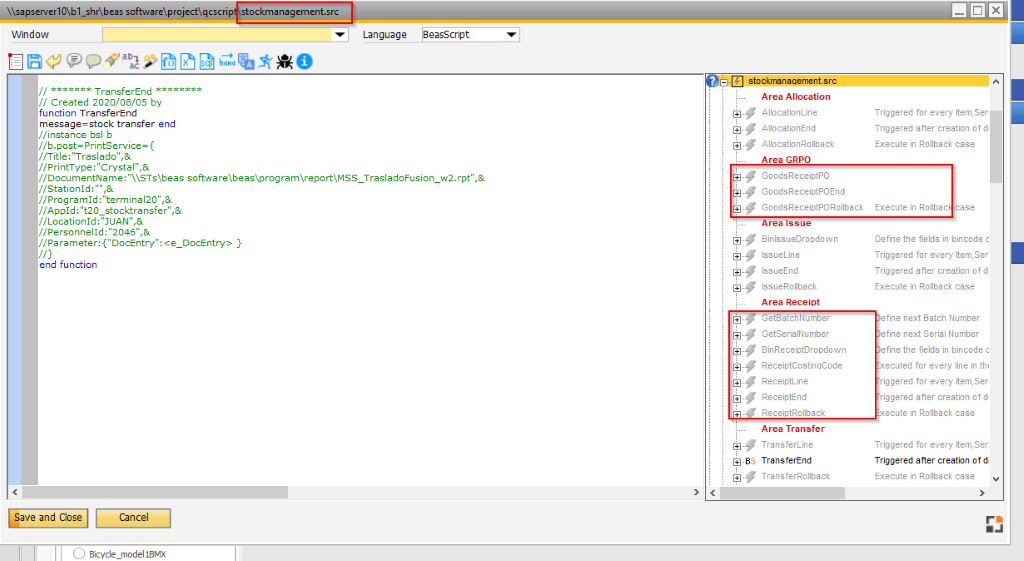
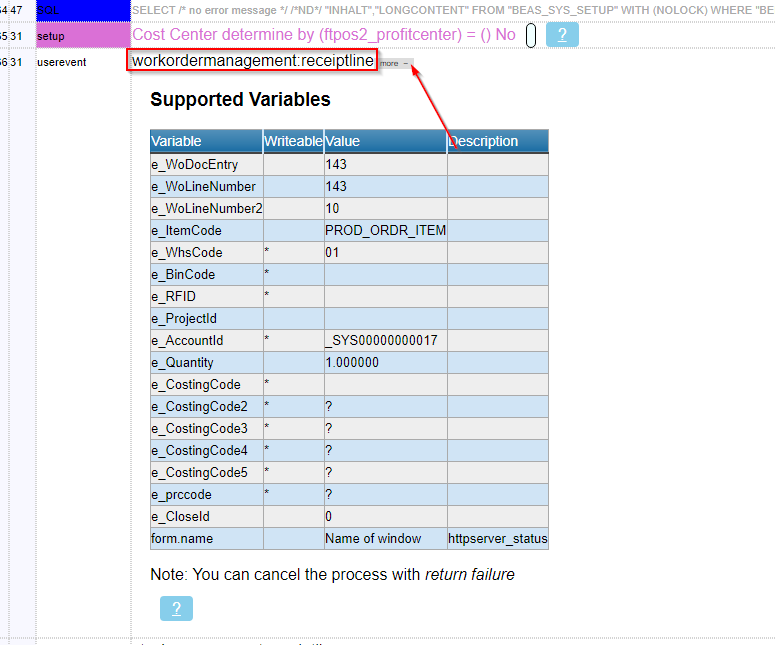
if you expand them, you can see all variables which are available to use
Example:
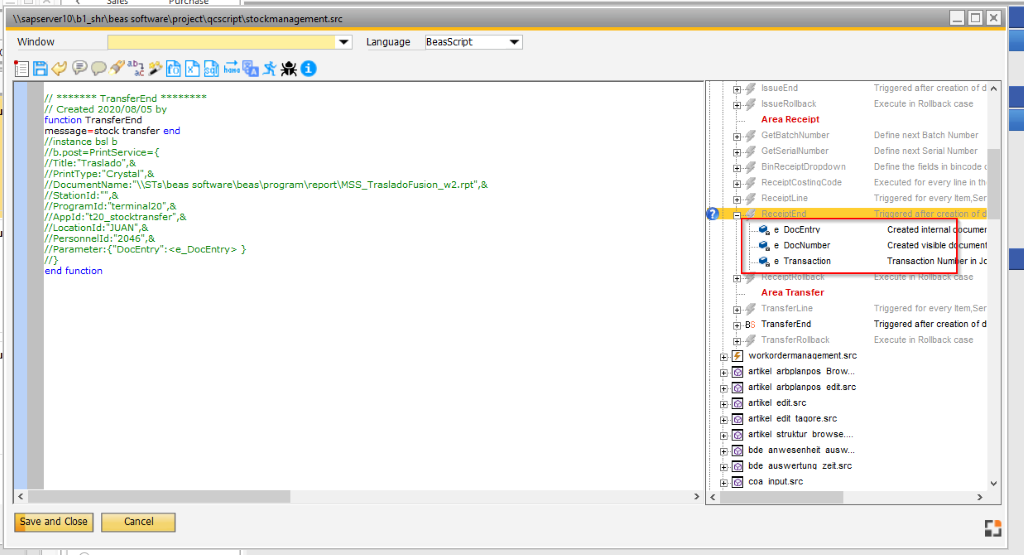
So now you should select the proper function.
In the second step, you decide to use the function when the WO good receipt has finished.
This is a function ReceiptEnd (you can use stockmanagment or workordermanagment)
// ******* Event ReceiptEnd ********
// Created 2021/03/04 by Patrik
function ReceiptEnd
return true
end function
You can also use the debug window, and there you can see exactly which function and event to choose.
To do this, start the Web server and login to the web with that port number, prepare the transaction, but don't save it yet.
Start debug window - set level 3
Save the transaction
Export debug to browser and check the events there.
Example: You can execute the message.
Open Web 2.1 from the Web server window:
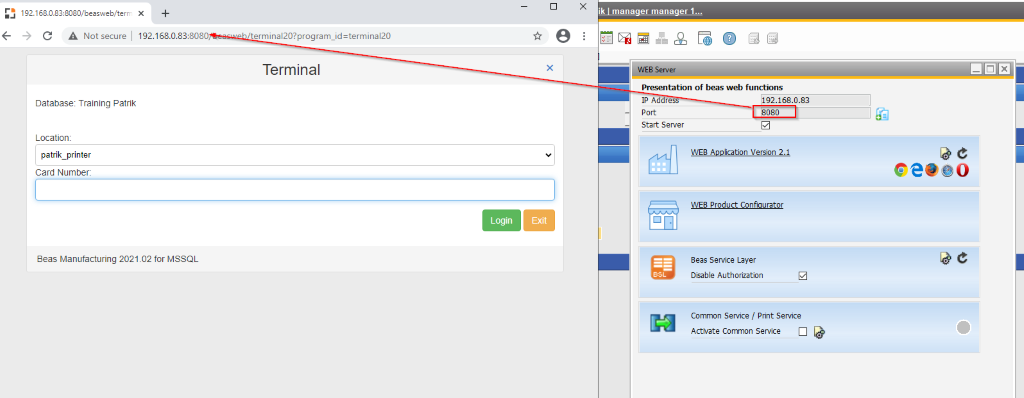
Prepare the transaction - open debug - set level 3 - and Save it
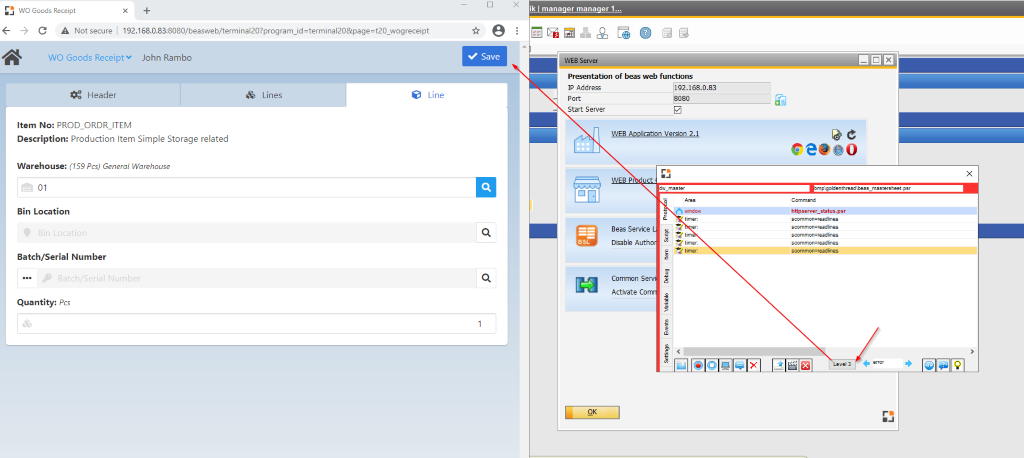
Stop debug and export to the browser (you can use the movie icon). In the screen you can upload to our server and provide us a link, but it's not necessary.
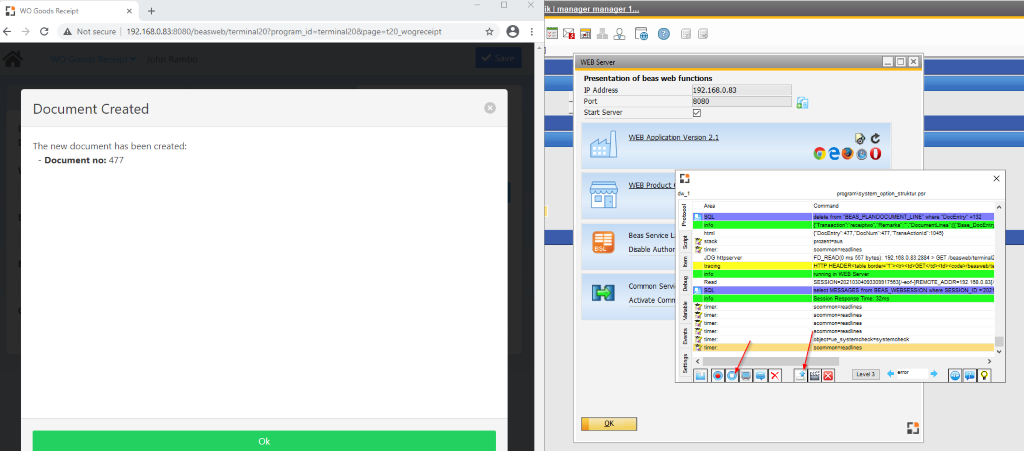
In the debug you can see all events with all variables which were triggered, like this:
The script used in this example was for stockmanagment:ReceiptEnd, so you can look for it.
(This helps you to find the proper event based on the variables).
As you can see here, this event is similar to the workordermanagment event, so you may use stockmanagment or workordemanagment alike.
You can use those variables in the print example which was provided in the beginning of this article.
e_DocEntry, e_DocNumber etc
Full script example, based on the variables from ReceiptEnd user event:
// ******* Event ReceiptEnd ********
// Created 2021/03/04 by Patrik
function ReceiptEnd
//Direct Print preview work order
printobject=setvar=sofortdruck=J
printobject=setvar=druckcopy=1
printobject=setvar=DocEntry=<e_DocEntry>
printobject=parameter
printobject=parameter_set
printobject=print=MyReport.rpt
return true
end function
Here you can find documentation on all user events and variables (under section “User events”)
http://help.beascloud.com/script/
Comments
0 comments
Please sign in to leave a comment.