You wish to print a custom CR report from a WebApp using Beas Script. You want to use the printer assigned to the login location chosen on the WebApp.
Step 1: Enable location selection when connecting to the WebApps. This is done here:
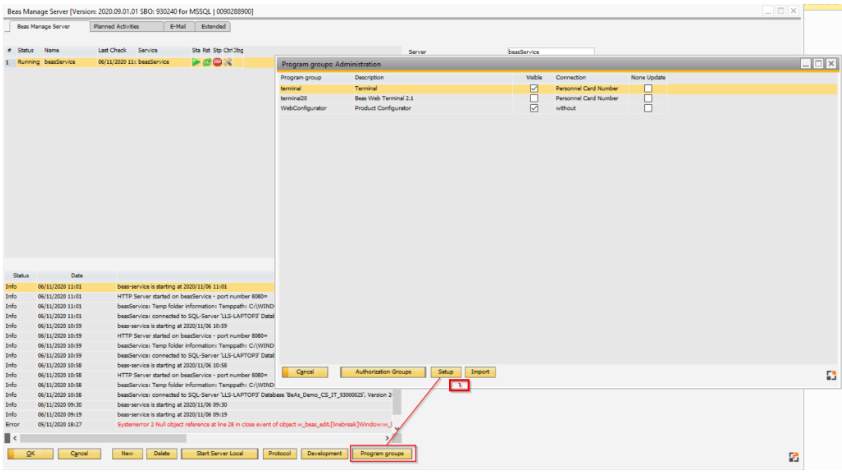
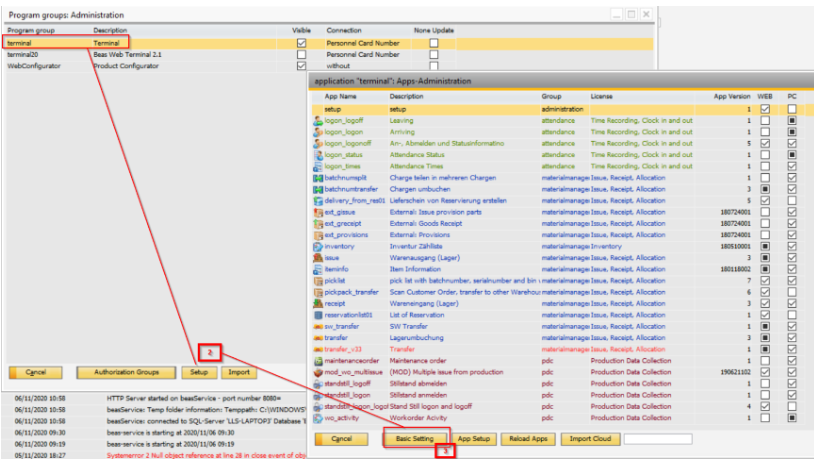
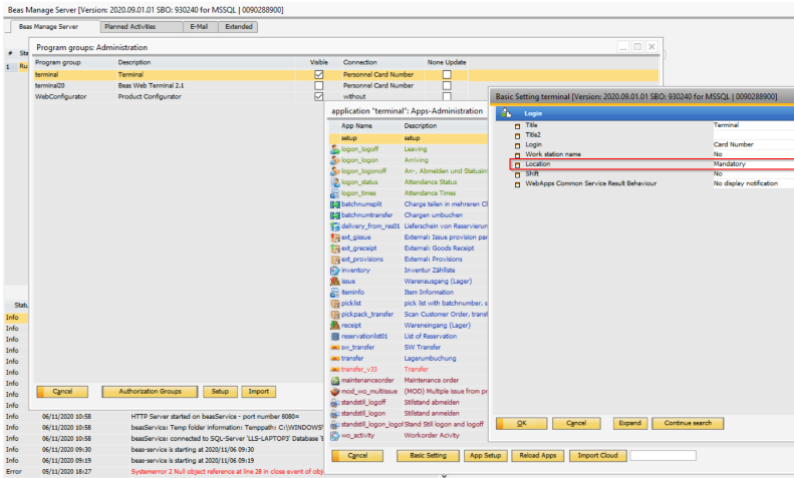
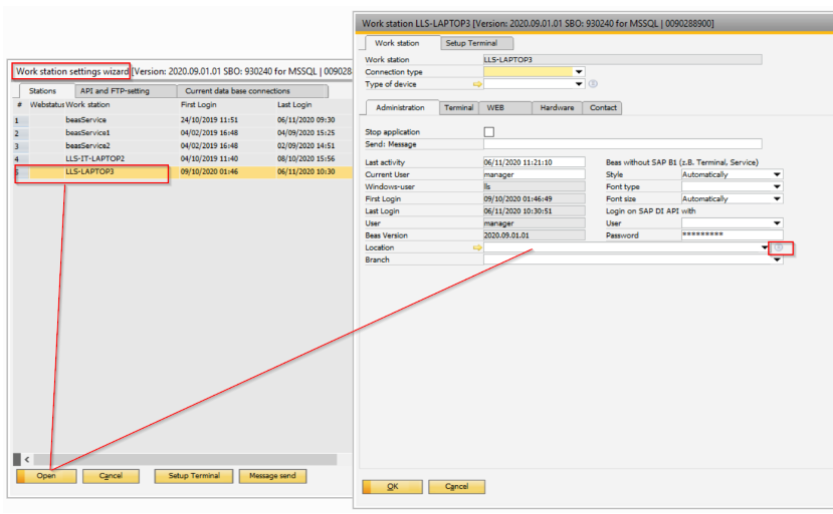
Configure your locations and printers here:
1.3 Step 2: Configure your project folder on the Beas Manage Server Settings:
When working with the Beas server installed locally on your machine, you can set the local folder of your Beas installation. For example: C:\Program Files (x86)\SAP\SAP Business One Server\B1_SHR\beas software\Project\ When setting the project folder, select the Bbeas service you're using for the web service and assign the correct path:
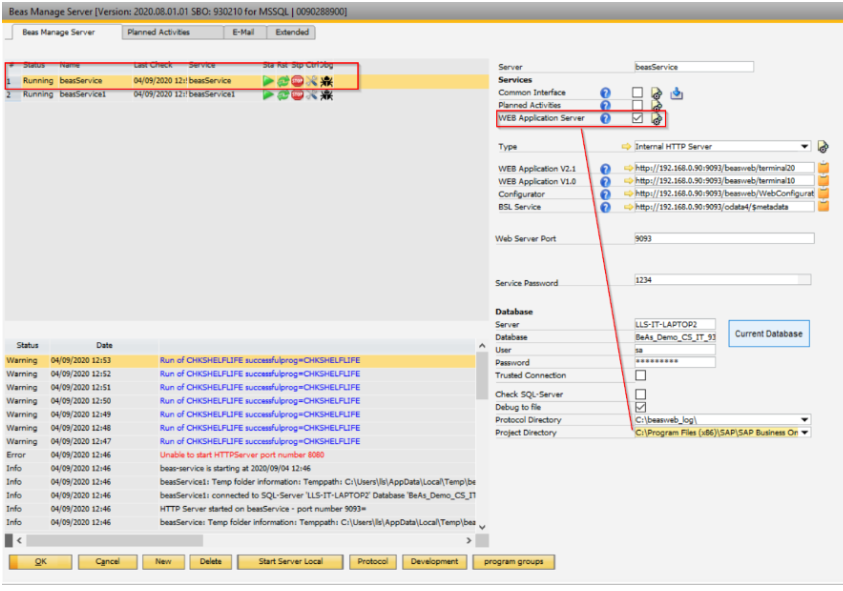
Please make sure that you set the top level of the project folder: in our example we have set the following path: C:\Program Files (x86)\SAP\SAP Business One Server\B1_SHR\beas software\Project
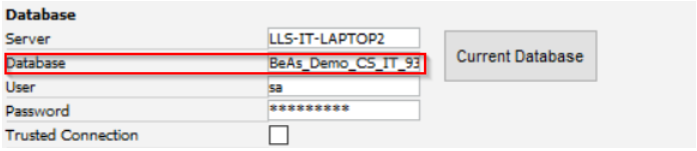
PLEASE NOTE: the system will look into the subfolder C:\Program Files (x86)\SAP\SAP Business One Server\B1_SHR\beas software\Project\BeAs_Demo_CS_IT_93000025 because it assumes the following path from the database name you have configured:
Step 3: Make sure the beas server service is run with Administrator rights on the LOCAL machine it is being executed on
Make sure that your Beas service for the Web Server is run with an account that has full Administrator authorizations on the machine you are running the service. In our example, the user account used for running the Beas service is a domain account THAT HAS BEEN CONFIGURED AS ADMINISTRATOR OF THE LOCAL MACHINE. See image below for the user account set for running the service:

Step 4: Create your Beas script file and place it in the project folder:
If the above steps are correct, create a new stockmanagement.src file that contains the following lines (we will print at the end of a stock transfer transaction done from the WebApps):
function transferend
sql=SELECT PRINTERNAME into :ls_printername from BEAS_SYS_LOCATION WHERE LOCATION_ID = N'<system.location>'
//your report name
printobject=openreport=Transfer.rpt
//connection opening
printobject=connectioninfo
// set quantity of copies (output)
printobject=setvar=druckcopy=1
//parameters for the report
printobject=setvar=docentry=<e_docentry,#0>
//printobject=setvar=myparam2=<paramvalue2>
printobject=parameter
printobject=parameter_set
// set printer (exact that name, which is defined in the Windows printer definitions)
tools=printer=getdriversport=<ls_printername>
printobject=crreport=selectprinter=<value_printerdriver>=<value_printername>=<value_printerport>
printobject=crreport=printout
end function
Place the file in the project folder as specified in the previous steps
Step 5: Make sure your CR report is working correctly
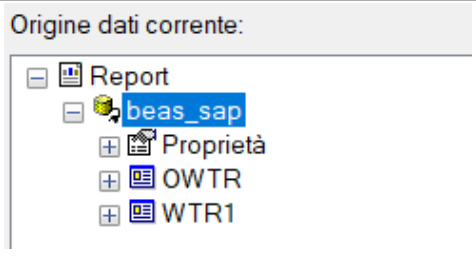
Make sure that your Crystal report file is connected to the correct database with the beas_sap ODBC default connection we provide. Your report connection should look as the following:
Try to preview the report directly from the Crystal reports builder and make sure that the preview works. It is recommended that at this stage you only have one input parameter for testing (in this case it is DocEntry).
Save the report and place it in the same project folder as per previous steps
Update beas server management by making sure it is restarted. If necessary, log out and back in again from SAP / Beas.
YOU’RE READY TO GO. When completing the stock transfer on the WebApp  , you will get the print of your stock transfer document.
Comments
0 comments
Please sign in to leave a comment.