This article describes how to configure Produmex WMS to use logistic carriers, such as pallets or boxes to take advantage of Produmex WMS while using and keeping track of logistic carriers. The first section of the article discusses the configuration needed for Produmex WMS to work with logistic carriers. The second section is a step-by-step guide on how to pick an order with Mobile Client while using logistic carriers.
Configuration
1. Create item master data
Set up your Logistic Carrier items.
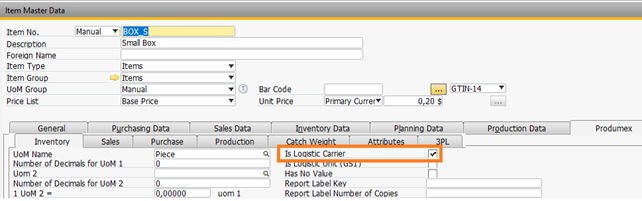
Define the logistic carriers in the Item Master Data window. In this case, a Small Box and a Large Box are created.
It is crucial to enable the “Is Logistic Carrier” setting so that WMS is able to recognize the items as logistic carriers.
2. Create logistic carrier location & setup on warehouse
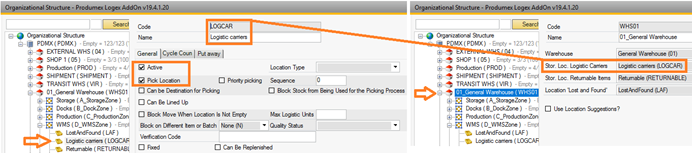
For WMS to work with logistics carriers, first create a bin location for storing the logistics carriers in the Warehouse. As a next step, configure the Warehouse to know what bin location to use as storage for Logistic Carriers.
Important: The Bin location needs to be set to Pick Location if we want to use these carriers during the picking process.
3. Set general setting for 1 location for logistic carriers
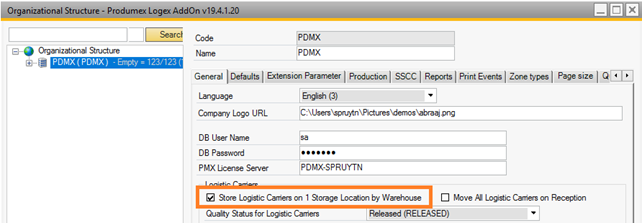
The last configuration is in the Organizational Structure at the company level. Activate the “Store Logistic Carriers on 1 storage location by Warehouse” setting on the General tab. Also, check the quality status.
4. Make sure to have stock available for the carrier items on this bin

This is not part of the configuration, but obviously, we need to ensure that we do have enough stock of logistic carriers to use and that they have the correct quality status. Remember that lockings can exist that affect the actual available stock.
Picking with Mobile Client
In this example, we are picking 6 items: 2x monitors that we put in a Large Box, and 2x mouse devices and 2x keyboards that we put on a Small Box.
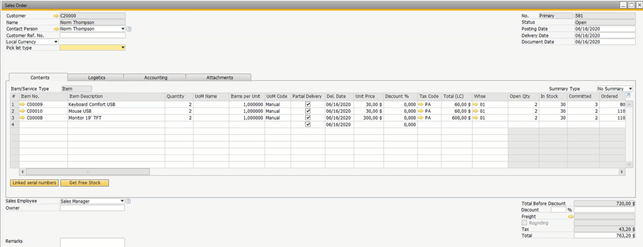
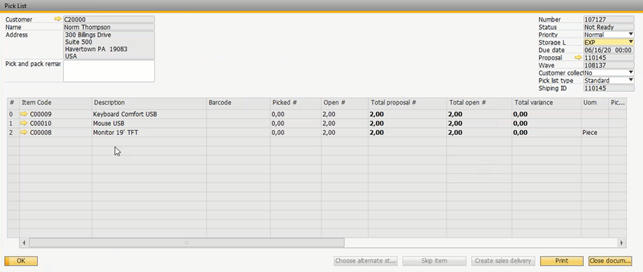
We have our sales order:
From our sales order we generate a picklist:
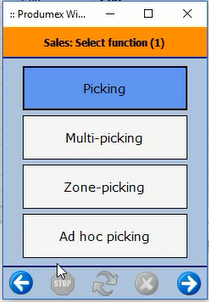
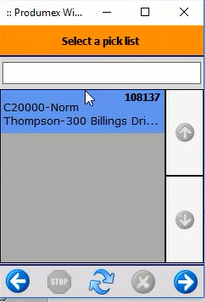
Our picklist is ready. We can run the Mobile Client and start the picking of our picklist.
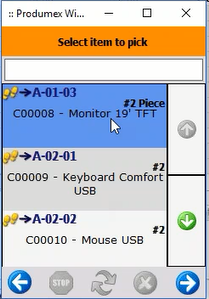
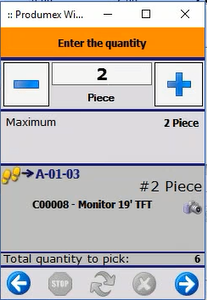
We start by picking the monitors, that will go to a Large Box.
The first thing WMS does is to ask if we want to use Logistic Carriers.
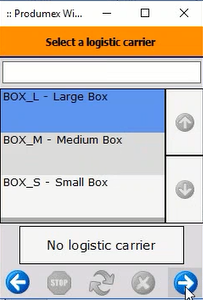
And we select the Large Box and continue with picking the monitors.
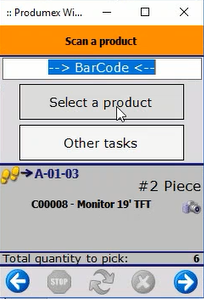

We now want to pick the other items.
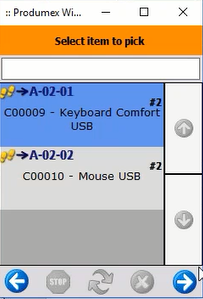
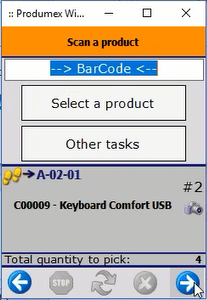
However, we want to use a new box (logistic carrier). To do that, we must start to pick another item, as we need to access the “Other tasks” menu. In this case, we choose the keyboards.
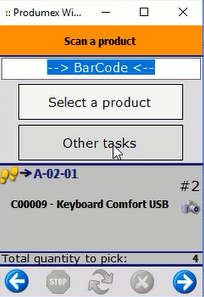
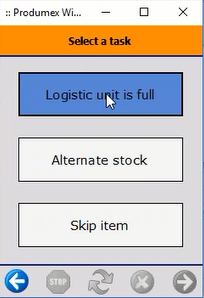
We go to “Other tasks” as we need to tell WMS we want a new logistic carrier.
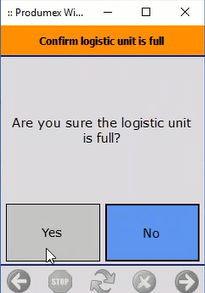
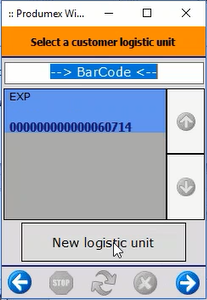
In WMS we force the use of a new logistic carrier by indicating the previous Logistic Unit is full and later on creating a new one. For now, we close the current one.
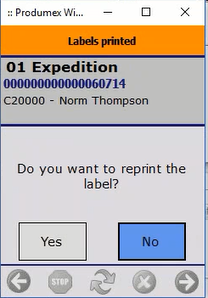
WMS prints the needed labels and returns to the picking screen.
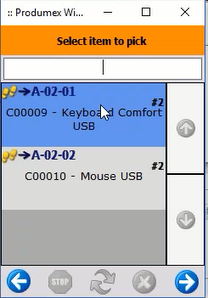
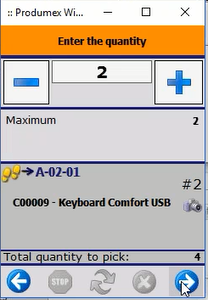
We must now pick the actual item we intend to pick (the keyboards), and WMS displays the already exiting logistic units. Instead of selecting our old logistic unit, we now create a new one.
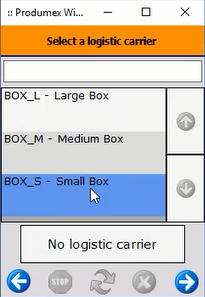
As we are creating a new logistic unit, WMS asks if we want to use a Logistics Carrier. For the keyboards, we want to use a small box.
And then we continue to pick our keyboards.
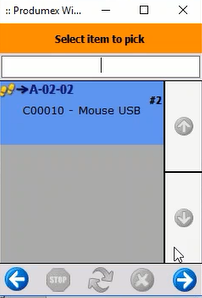
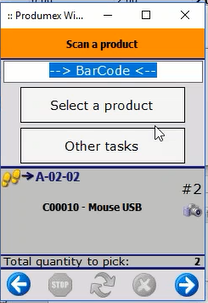
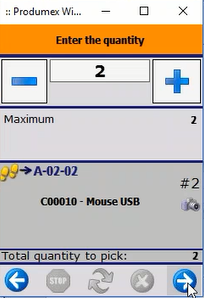
The last step is to pick the mouse devices. Since we want to continue to use the same Small Box for the mouse devices, we can proceed directly to picking them and WMS assumes that it is the same logistic unit and Logistic Carrier.
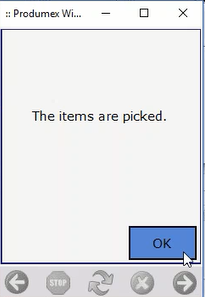
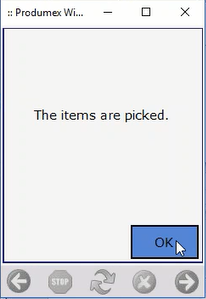
The picking process is finished and we print the configured labels, create delivery notes and other documents, depending on the configuration (related screens are included in this article).
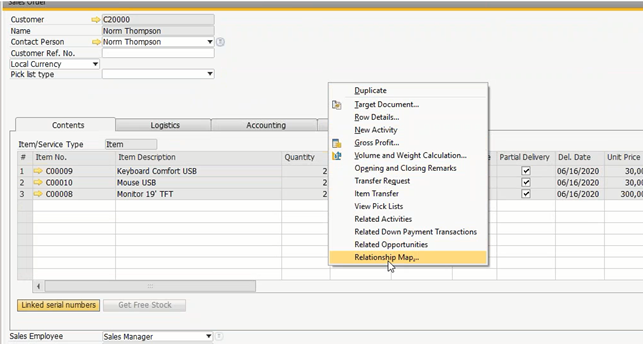
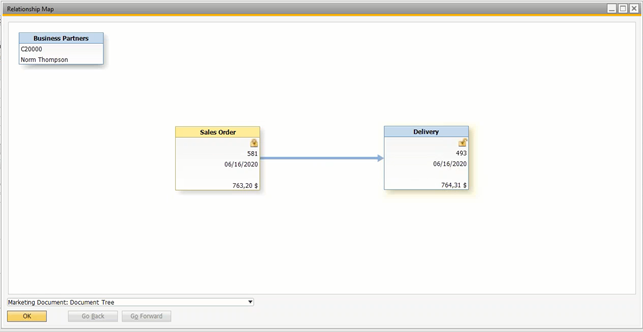
Now we can see the result in SAP Business One. In our sales order, we open the relationship map.
View the Delivery note:
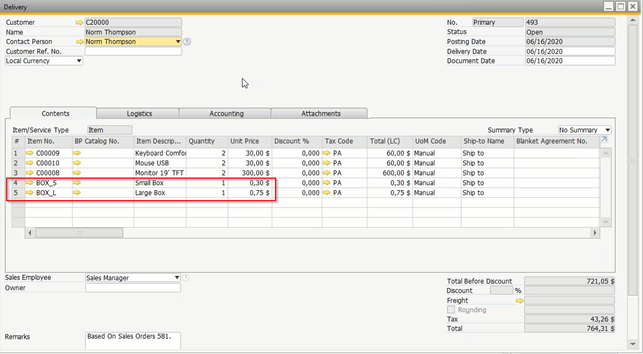
Note the presence of the boxes.
We can also open the Packing Slip.


Now WMS has been configured to use Logistic Carriers during picking.
Comments
0 comments
Please sign in to leave a comment.